As part of my “Power to the People” session (presented at SharePoint Saturday Pittsburgh, several events in South Africa, and SPS Caribbean), I demonstrate a Flow which creates an item in a SharePoint custom list when there’s a tweet containing a particular hashtag (for example, a tweet about the event at which I’m speaking). This is one of the existing Flow templates, so it’s pretty simple to implement, but I’ve done some additional work around the Flow to make it more useful.
Tweet Content Type
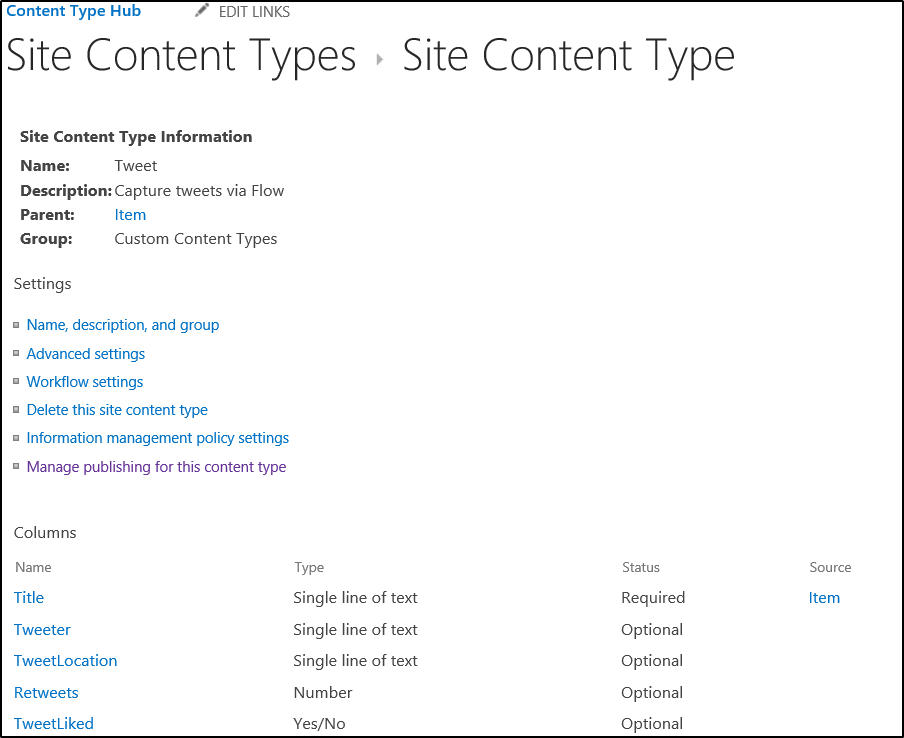
Because I want to be able to create SharePoint tweet lists for various events, I’ve created a Tweet content type in the SharePoint Online Content Type Hub, so I can use it anywhere in my tenant. The Content Type Hub is located at https://YourTenant.SharePoint.com/sites/contenttypehub. Creating and publishing a Content Type from the Hub is outside the scope of this post, but I’ve written a walkthrough here. Essentially, though, here’s the Content Type I created, containing 4 custom Site Columns to capture the tweet data I want to display (Tweeter, TweetLocation, Retweets, and TweetLiked) – in addition to the tweet itself, which will go into the Title column.
Tweet List
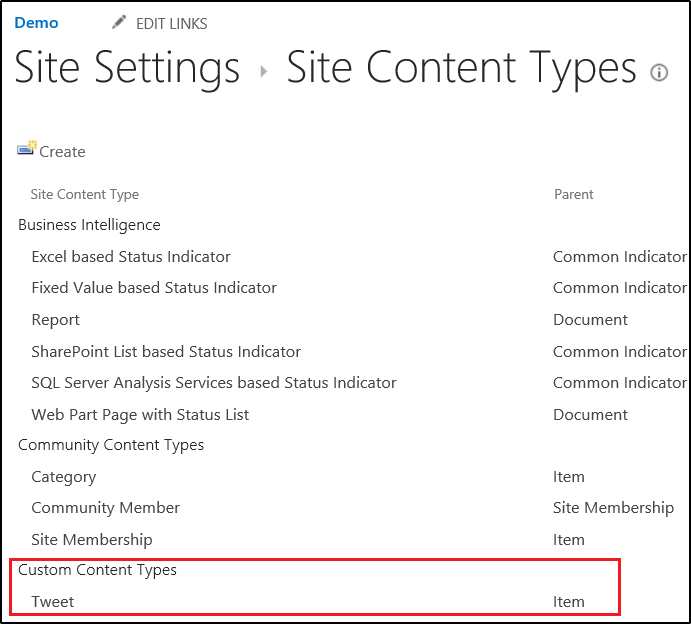
After the Content Type has been published (which may take up to several hours in SharePoint Online), I can see my Tweet content type listed in the Content Type Gallery of the subsite where I want to create the tweet list.
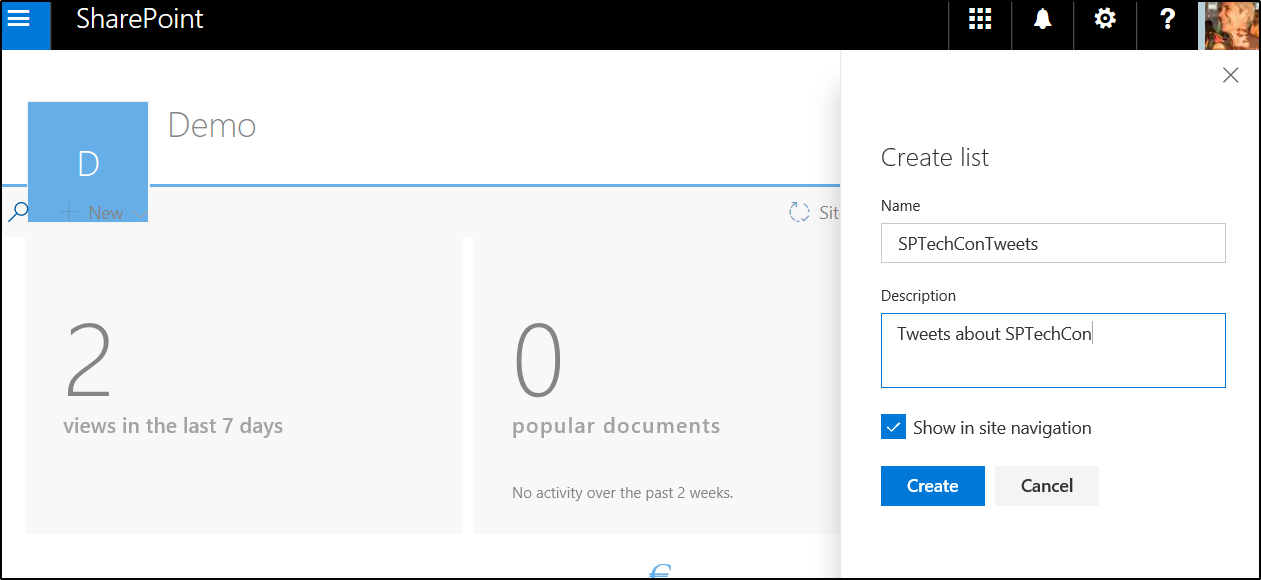
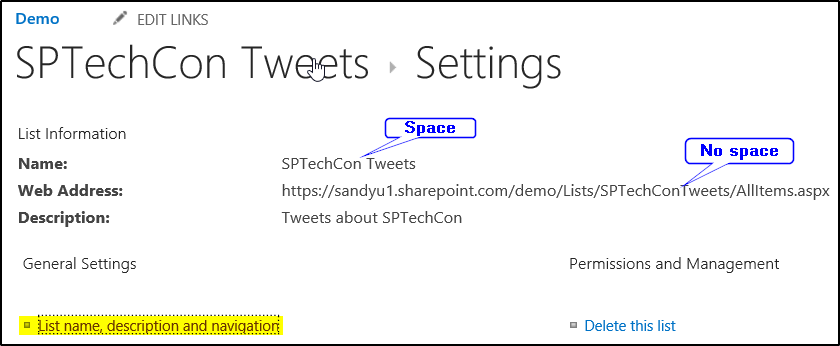
Next, I want to create a new Custom List which uses the Tweet content type… For this demo, I’ll record tweets using the #SPTechCon hashtag. Here, I’m creating my list on the Demo site (note that, as always, I create the list with no spaces in the name so the URL doesn’t contain %20, then I go to List Settings to add a space for readability):
To enable the custom Tweet content type on this list, go to List Settings (which is now available via the gear icon in the upper right of your SharePoint page), click on Advanced Settings, and set Allow management of content types to Yes. You’ll now see a Content Types section on the List Settings page, and you can click on Add from existing site content types to enable the Tweet content type on this list.
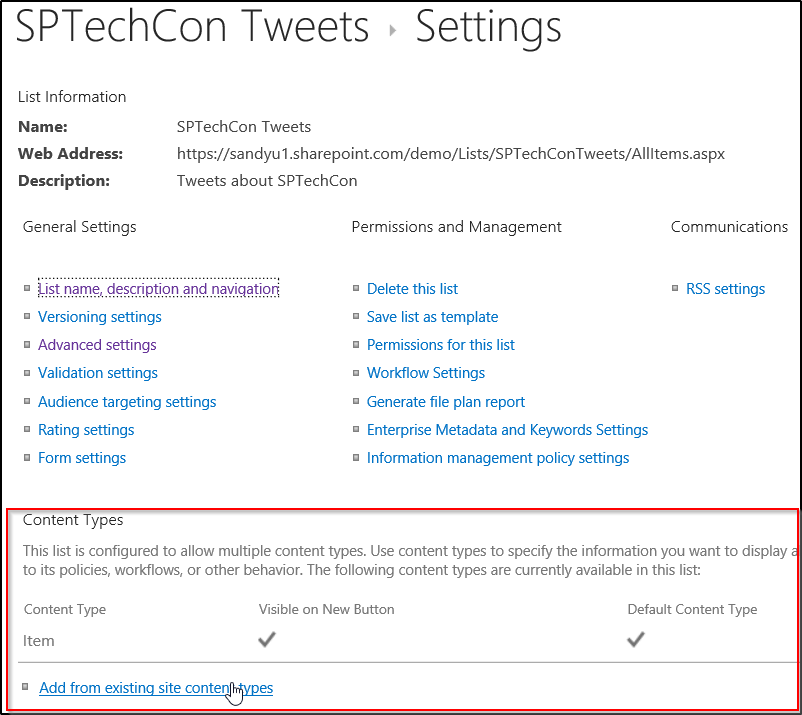

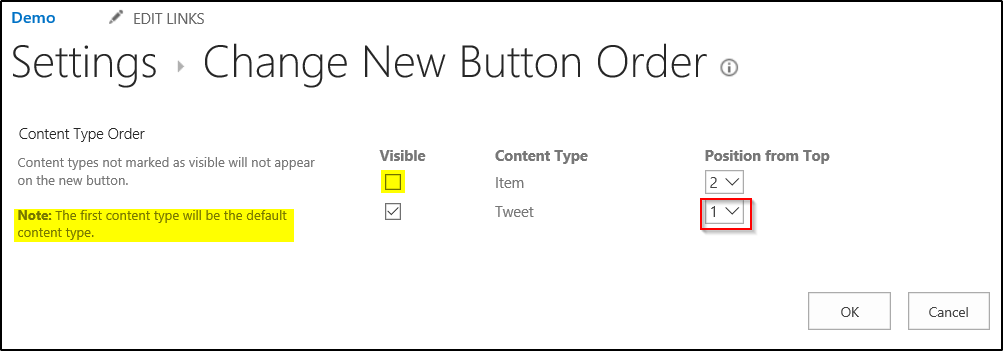
Back on the List Settings page, I can now see the Tweet content type listed below the default Item content type. I want all new items to use the Tweet content type, so I click Change new button order and default content type to set the default to Tweet instead of Item. To make a content type the default, change the Position from Top value to 1. And while I’m at it, I’m also going to hide the Item content type entirely by de-selecting the Visible checkbox for Item – although I don’t intend to make manual entries to this list, one never knows what someone else (including my future self) might come along and try to do…
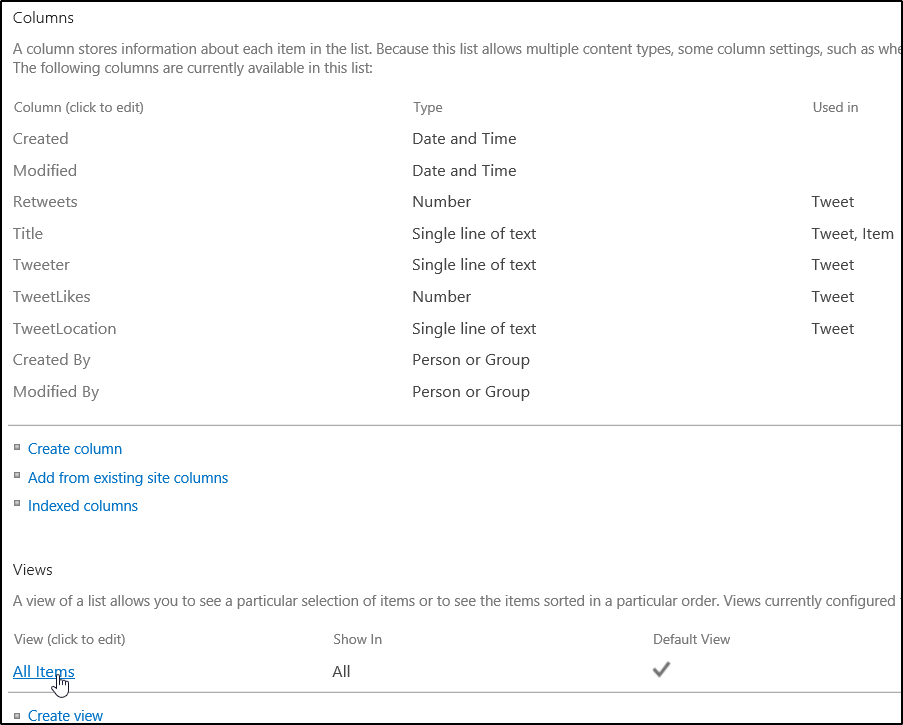 Back on the List Settings page, I can now see the columns from the Tweet content type in the list of columns.
I’m also going to modify the All Items view to include those columns, so I can see them by default when I view this list. In addition, I’ve added the Created column to the default view, sorted in descending order, so the latest tweets will be at the top.
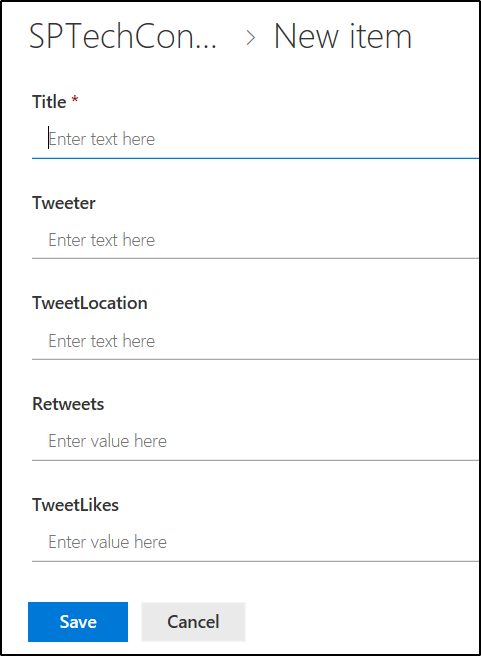 You should see now that if you go back out to the list and click New to add a new item, the fields are those of the Tweet content type. But we’re not going to do that – we’re now going to create a Flow to add new items to the list….
Create a Flow based on the Tweet list
Now for the fun part! 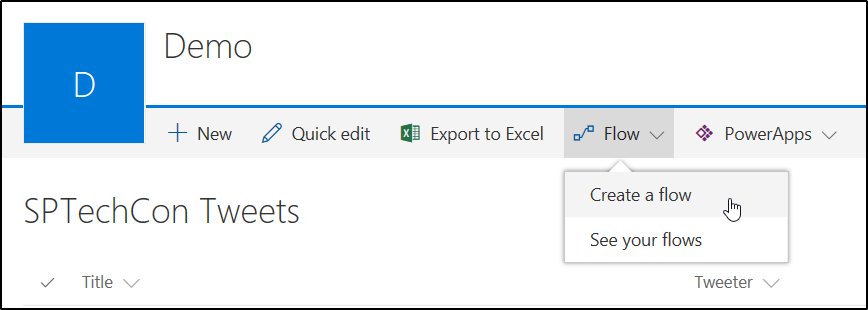 From the Modern experience view of the list, simply select Flow>Create a Flow from the top menu.
 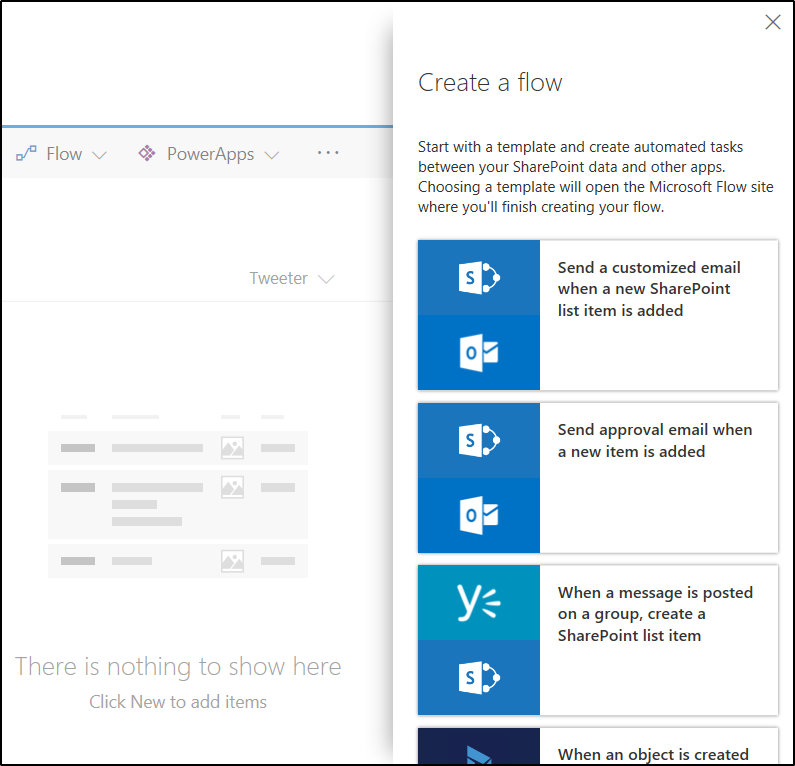 This will bring up a list of templates to choose from which are related to SharePoint lists, since that’s where we’re creating the Flow. Note, though, that Flows are related to the user account which is creating them, not to the SharePoint list they’re created from. That means that another user viewing this SharePoint list won’t see this Flow if they click See your flows in the dropdown. [As of Winter 2017, you can invite another user.]
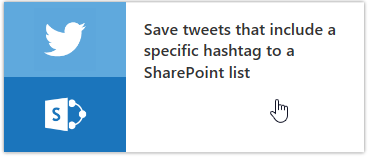 Scrolling down through the list, you should see one called “Save tweets that include a specific hashtag to a SharePoint list”.
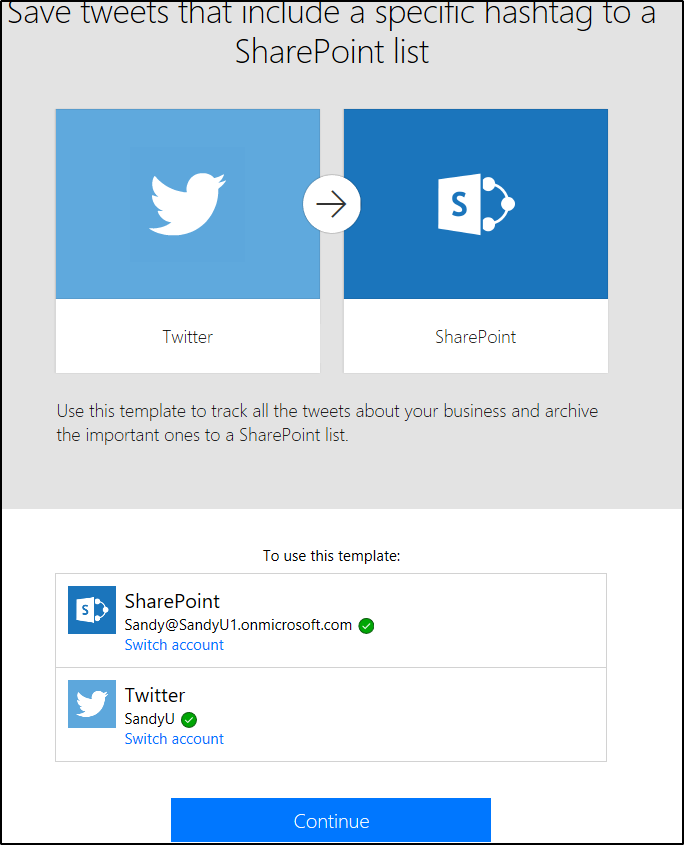
Clicking on the template tile opens the flow.microsoft.com site in a new browser tab, where you will need to set credentials for your Twitter account and for SharePoint Online if they aren’t already set as Connections in Flow/PowerApps. Then click Continue.
Next, you’re presented with a schematic diagram of the Flow, based on the template you chose. I like to change the Flow name at the top as a first step, so I don’t forget to do it at the end before saving.
 First, let’s look at the Trigger, which is the first box in the diagram: When a new tweet appears. A Flow will always begin with some sort of trigger – something that makes it start. These can be things like events in connected web services (such as we’re using here), built-in triggers such as running a Flow on a recurring schedule, or launching a Flow via a button (say, in a PowerApp). In the current example, we want to run the Flow any time someone tweets containing the hashtag for an event (namely the #SPTechCon hashtag in this demo).
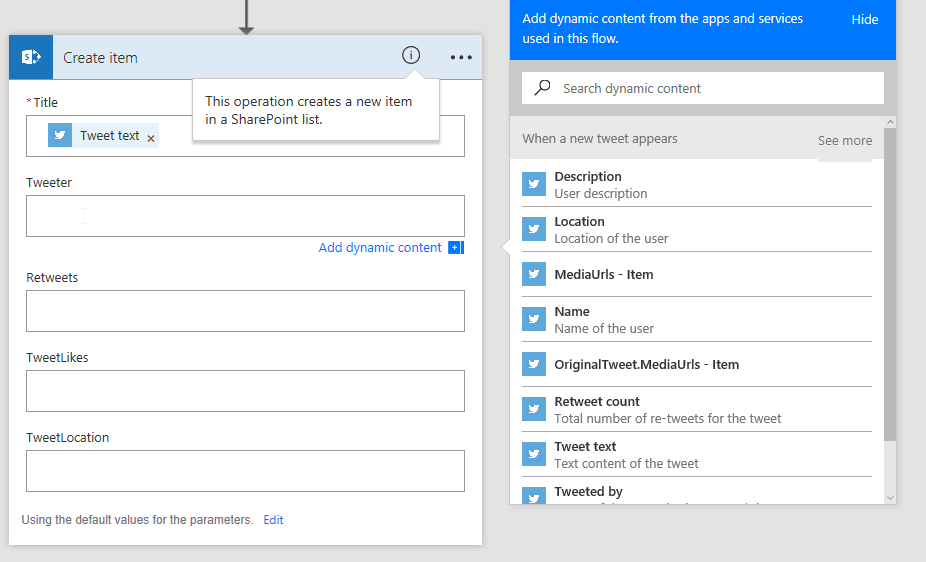 Next, we need to configure the Create Item action (the second box in the diagram). This is a very basic Flow, so all we want to do when a triggering tweet occurs is to create a new item in the SharePoint custom list we created earlier – we aren’t going to set any conditions or looping. Note that there are text boxes available for each of the custom columns in the SharePoint list from which we created the Flow. Flow has assumed we want the “Tweet text” to be the Title of our SharePoint list item, which is true, so we can leave that as is. When you move the cursor down to the Tweeter field, a dynamic content dialog will appear, listing each field available from the “When a new tweet appears” trigger, along with a brief description of what the field is. This is a great improvement over the experience prior to October 2016, where it displayed small inline buttons for each available field.
Note that the list of available fields will depend upon the data type of each SharePoint column. For example, since the Retweets column is numeric, you can only select a numeric column from the Twitter connection. However, you can choose to populate a SharePoint text column with numeric values (though they’ll then be text). Note also that you may need to click the little “See more” link above the fields to see some of the less commonly used ones (as I had to do for TweetLikes).
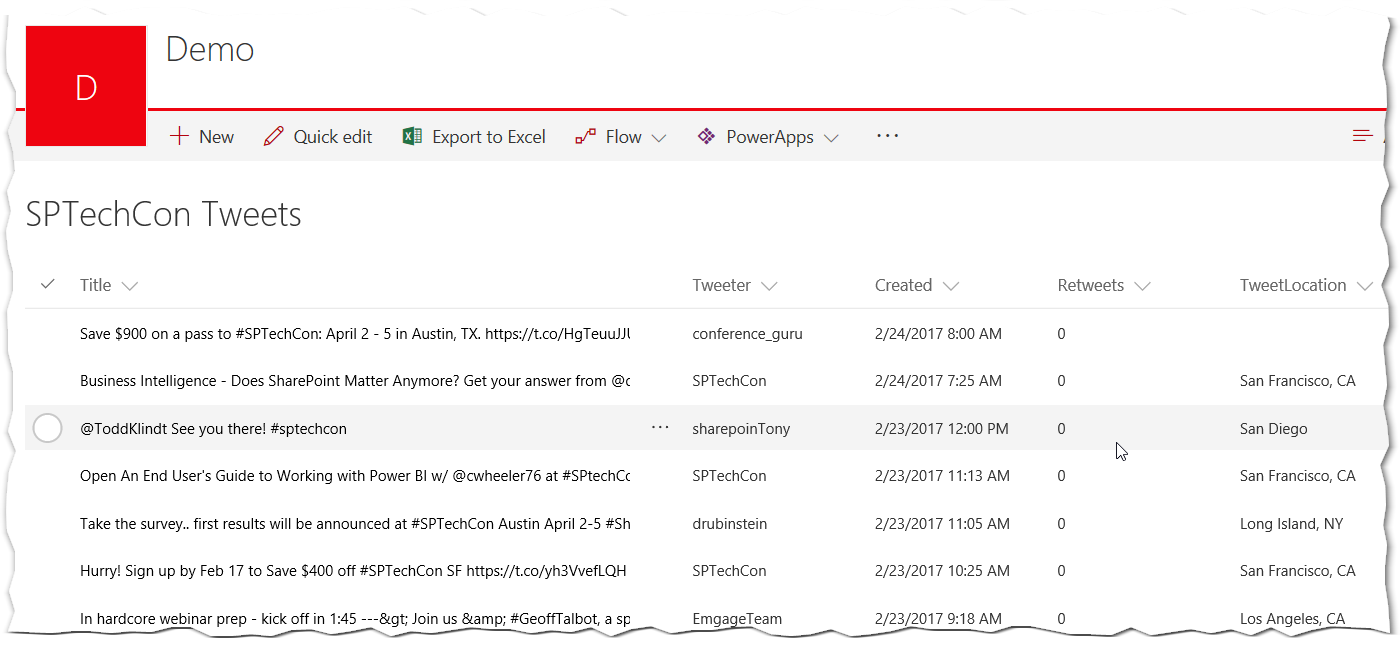
After saving the Flow, and allowing it to run for a while (assuming there are tweets occurring with the given hashtag), you can see the results in the SharePoint list:
I hope this has been a helpful walkthrough…
[Note: I had started this post a couple months ago, and ran into some trouble with the data type of the TweetLikes field, then became very busy and didn’t get back to the post. I decided to just go ahead and post it now, as I have other posts to get on with 🙂 But that’s why that field isn’t consistent through the screenshots – sorry about that!]
NOTE: The behavior and screenshots documented in this post were current as of February 2017. They may be different at a later date.

Pingback: Collaboration With Constituents Using Office 365 [Part III] – Push and Pull